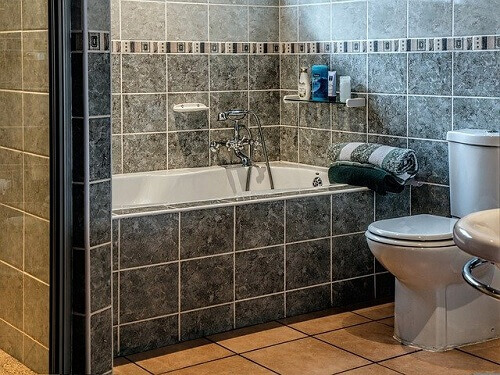
Tips On How To Create Seal That Is Watertight For Your Bathtub
Worrying that water may squeeze around the edges of the new bathtub you are installing is a common fear, and professional plumbers may even get it once in a while.
There could even be water squeezing around the edges of the old bathtub. When you use caulk on the edges, it helps create a watertight seal to prevent any leak of water around the edges of the bathtub.
This is why choosing the right caulk is of so much importance. It would help if you chose the right caulk to make sure that the bathtub is sealed strongly to prevent any leaks later on.
The caulk you end up choosing should adhere to the surface of your wall and the bathtub as well. Whether the wall is a tiled wall, acrylic wall, or drywall, the caulk that you choose should be able to adhere to it.
So we have now seen how important it is to create a watertight seal around your bathtub to prevent any water leak.
We have also seen that choosing the right caulk for the job is very important because the caulk needs to adhere to the surface of your wall and your bathtub.
So now, we will take a look at the steps needed in creating the watertight seal for your bathtub.
However, before we look at the steps involved in sealing your bathtub tightly, let us take a look at the caulk that is suitable for use for such kind of a job.
The Best Type Of Caulk To Use For Sealing Your Bathtub
The best caulk to use in sealing your bathtub tightly should be latex or silicone. Between these two caulks, you can choose the one you think you can work with. Let us take a brief look at each of them.
Latex Caulk
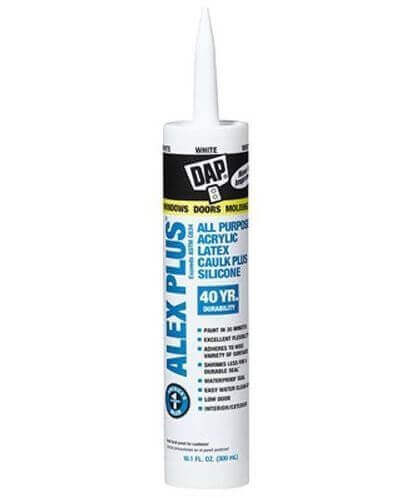
This caulk is very easy to use and does not require you to have a set of special skills. You can apply this caulk easily, and any mistake you make can be resolved easily.
All you have to do is run your wet fingers over the bead of caulk. However, with time, latex caulk will dry and then eventually begin to crack, meaning that you would have to replace the latex caulk more often.
Latex caulk can be used for uneven and porous surfaces like stone tiles and wood trim.
Silicone Caulk
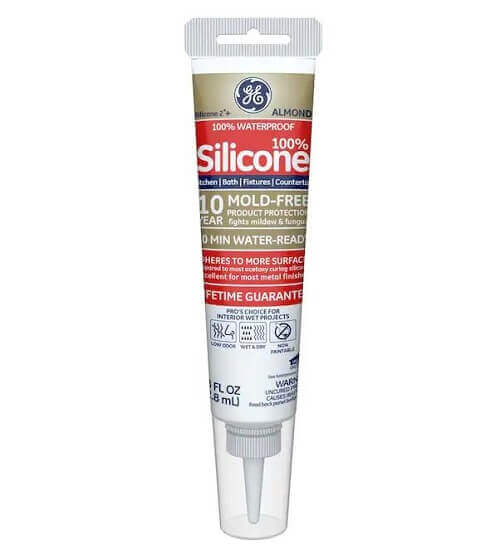
This is another caulk that you can use for creating a watertight seal for your bathtub.
It is the best caulk to work with if the surface you are working on is a slick and non-porous surface such as ceramic tile, glass, and metal. However, you need to have some skill level before you can apply silicone caulk to your surface.
It is not easy to work with, like how easy latex caulk is. You cannot clean silicone easily as well, and you will need to clean it with the aid of some mineral spirits.
So these two caulks mentioned above are the best to use when creating a watertight seal for your bathtub.
Choosing between the two will depend on your experience in using caulk and the kind of surface you are dealing with.
So you should check out the surface you will be working on before choosing the caulk. On that note, the best caulk to work with for beginners will be latex caulk.
How To Create A Watertight Seal For Your Bathtub
When creating the seal for your bathtub, there are some easy steps that you need to follow. Here are the steps below.
Creating a watertight seal can be effortlessly accomplished by any homeowner, eliminating the necessity of hiring a professional plumber and parting with your money unless you willingly choose to do so. Let’s now explore the steps in establishing a watertight seal below.
- Utilize a utility knife to cut through the center of the old caulk. It’s essential to remove the old caulk before replacing it with a new one. Cut through the old caulk on the bathtub using the utility knife. Subsequently, peel off the old caulk from both the bathtub and the wall; it should come off in a long strip. Afterward, use a razor blade or any sharp tool to scrape away any remaining caulk.
- Take a damp cloth and apply soap scum to clean both the wall and the bathtub. After cleaning, rinse the area with water and ensure it’s thoroughly dried. It’s essential to clean the wall and tub whenever you replace the caulk. This cleaning process ensures proper adhesion of the new caulk. Additionally, clean around fixtures and the areas where the caulk meets the bathroom floor.
- Fill your bathtub with water until it reaches the base of the overflow drain located on the side of the bathtub. This will create some weight inside the bathtub and even lower it slightly. Although caulk is flexible, it is not that flexible to span the gap between the bathtub and the wall. When you caulk the bathtub while it is full, it will help the caulk create a stronger seal that will not be able to crack easily.
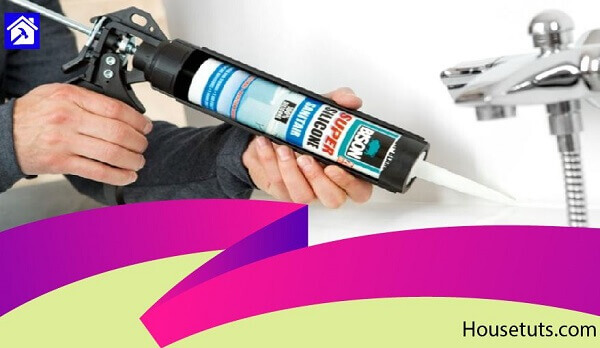
- Now, take the caulk you chose and push the tube into the caulking gun. Cut the tip of the tube with a utility knife. The cut angle should be 45 degrees. After that, you should pierce the nozzle seal with a nail. Now, squeeze the trigger to get the caulk into the nozzle.
- Now, hold the caulk at the 45-degree angle along the line where the wall meets with your bathtub, and then squeeze the trigger. As you squeeze the trigger, slide the caulk gun along the top edge of the bathtub to lay a bead of caulk there. You then flatten the caulk bead with your finger. Please note that your finger must be wet to get it done properly. After using your finger to flatten the caulk bead, you can then use a cloth to wipe your finger clean.
- Make sure to add some more caulk along with the fixtures, like where the faucet and the knob that controls the water meet the bathtub surround or the tub. You should also apply the caulk along the base of the tub, where it meets the floor.
- After applying the caulk well, allow it to dry overnight and drain the water out of the bathtub. You can now use your bathtub for your bathing activities again.
As you can see from these, applying a watertight seal to your bathtub can be done easily and in no time at all. You do not need to assemble a whole lot of tools as well.
Conclusion
So that is just how you can get your bathtub sealed tightly to prevent any water leaks. As you saw in the article, there are two types of caulk, latex caulk, and silicone caulk, that you can choose from for this job.
The one you choose will depend on your skills and experience in doing something like this.
I hope this article has been quite helpful to you. Keep on reading more home renovation-related articles on this site.
For more bathroom tips, you can check out how to remodel a bathroom, how to use peel and stick tile for bathroom remodeling
We all know that the recent quarantine imposed on several countries across the globe due to the coronavirus pandemic has Read more
The renovation of your bathroom can be quite an exciting task for you. However, before you do anything, you first Read more
Knowing how to install a bathroom sink drain is something that I think everybody in the household should know how Read more
Trying to estimate the exact time it will take to complete your bathroom remodeling can be quite a task that Read more

Can you use peel and stick tile in a shower? and have you ever considered peel and stick tile for Read more
You can increase the chance of remodeling your bathroom to look as good as new with these steps, this article Read more

Managing glass shower doors can indeed feel like a persistent challenge, especially when contending with spots and soap scum. Fortunately, Read more