How To Use The ‘Peel And Stick’ Tile For Remodeling Your Bathroom
Can you use peel and stick tile in a shower? and have you ever considered peel and stick tile for your DIY home remodeling before?
If not, then maybe you would be tempted to try it by the time you are done with this article because this article is going to take you through how to install peel and stick tile in the shower.
If you have not even heard about it before, we will go through the whole thing step by step to help you know everything about peel and stick tile.
This article is also the peel-and-stick tile bathroom guide you have been looking for on the internet.
Can You Use Peel And Stick Tile In A Shower?
You can use peel and stick tile to remodel your bathroom, there is so many peel tile that is used to give your bathroom an aesthetic look.
Before delving into the types of peel and stick tile and how to use it, let’s first explore what peel and stick tile is.
What Is A Peel And Stick Tile?
A peel and stick tile is simply a tile that has been made from glass, vinyl, and sometimes made with a metal that has an adhesive backing making it stick to many surfaces.
This is as easy as the name sounds. This lightweight and flexible material can be used for home remodeling, especially when the homeowner himself is doing the remodeling.
It comes with an adhesive backing to allow it to stick to walls or anywhere you will want to stick it.
If you are looking for a high-quality look without having to break the bank, then the Peel and Stick tile is what you have been looking for.
It is not expensive, you do not need to hire the services of a professional, and you do not need to have any tools available as well.
This is something that you can use on your own without professional help from anyone.
The Benefits Of Peel And Stick Tile
When you go in for the Peel and Stick tiles, there are several benefits of the product that will prove that you made the right choice for choosing it too.
Let us look at some of the Peel and Stick tile benefits.
Affordable
The Peel and Stick tiles are very affordable, and you do not need to buy grout, mortar, special tools, or sealer.
You do not need to hire any contractor to fix the styling peel-and-stick tile for bathroom walls.
No labor costs and no tools. Meaning that it will not cost you at all to purchase the Peel and Stick tile in your bathroom remodeling project.
DIY Friendly
This means that you can work with the Peel and Stick tiles all on your own without the need to call any professional for help. You can cut and clean it easily without any prior experience.
All you have to do is peel it and then stick it to where you want it to be. They are just like the stickers that you used to play with when you were a kid.
Since there are many people still home due to the pandemic, you can try your hands at the Peel and Stick tiles to get a feel of how easy they are to use.
Several Styles To Choose From
With the Peel and Stick tile, there are several types and styles that one can choose from to suit their taste and preferences there is peel and-stick tiles for a bathroom shower and many more.
So if you are someone who leans more to the traditional side or you are someone who likes to dabble with the newest things in style and luxury that the world has to offer.
You will have no problem choosing a Peel and Stick tile that is made perfectly for you and your home.
There are a whole lot of options for you to choose from. I am sure that most people thought that the Peel and Stick tile was lacking in style because it can be applied easily by anyone.
You can now see that that is not the case at all. It does not matter the part of your home where you plan to install them, there is always something for you.
Where To Install Adhesive Tiles
The Peel and Stick are not the everyday stickers that you see the kids in the streets playing with, no.
The Peel and Stick tiles are different from the adhesive tiles you see which are flexible and coated while looking at plastics.
These are made of high-quality vinyl and aluminum. Below are some places where you can install adhesive tiles in and around your home.
Indoors
You can easily install the adhesive on the walls inside your home without any issues.
However, the particular place you install it must be exposed to extreme heat or must not always be wet.
Kitchen
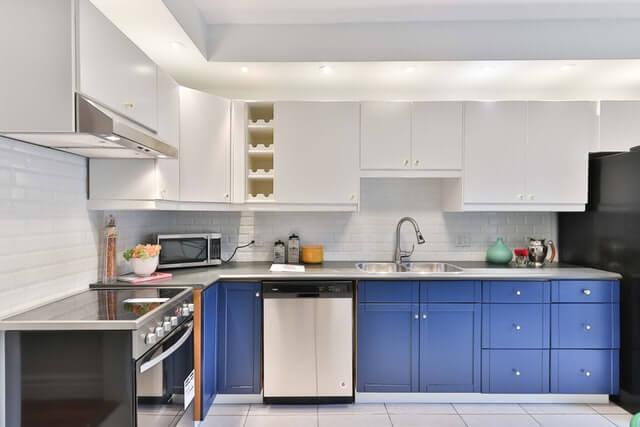
You can also install the Peel and Stick tiles on the walls above the counter in your kitchen.
It is best to allow a space of about 2 inches between the tiles and any appliance in the kitchen that gives off a considerable amount of heat.
Examples are the toaster and the ovens.
Behind The Stove
They can also be installed over the stove as well in your kitchen. However, if you install it above the stove, you should allow a space of about 8 to 9 inches between the stove burner and the tiles.
The ranges and the stovetops can also cover the Peel and Stick Tile in your kitchen above the stove.
Make sure that the tiles are permanently installed according to the fire codes of the area.
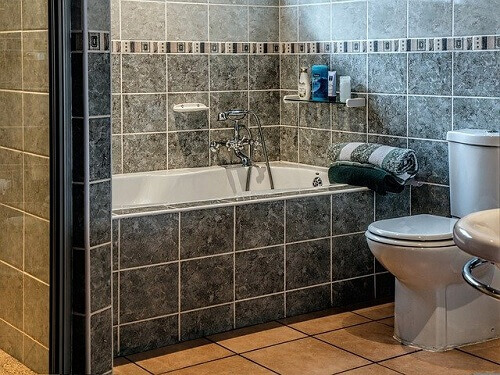
Bathroom Walls
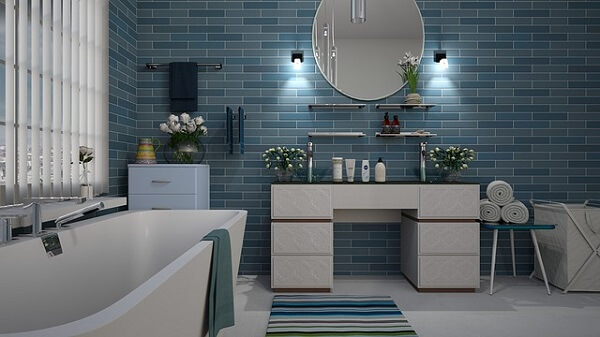
Yes, they can be installed in your bathroom as well, and you can use them to create a stunning backsplash with the Peel and Stick adhesive tiles.
It would help if you watched out not to install the tiles in areas constantly exposed to water in the bathroom.
An example of such a place is the shower wall. Apart from that, they can be installed behind the sink and on the bathroom wall perfectly.
Types Of Peel And Stick Tiles
So we have seen the benefits of the Peel and Stick tile, and we have also seen some of the places in the home where they can be installed easily.
Let us now take a look at some Peel and Stick tile styles that you can choose from when you go out to shop for one.
Copper Style Peel And Stick Tile Design
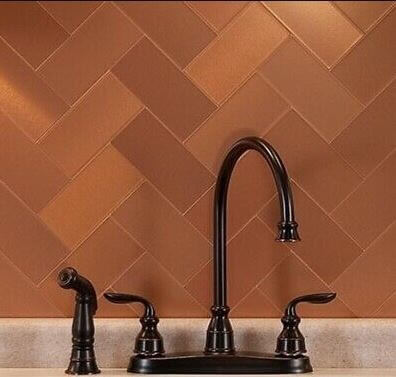
The copper style is a fantastic design that can be chosen as a backsplash for your kitchen.
The metal tile is unique and not one of your average peel-and-stick backsplash tiles.
The design has a mix of copper tones in a contemporary picket tile that gives off a metallic shimmer that will undoubtedly catch the attention of all who visit your kitchen.
You can trim them easily since they have a thickness of just 5mm.
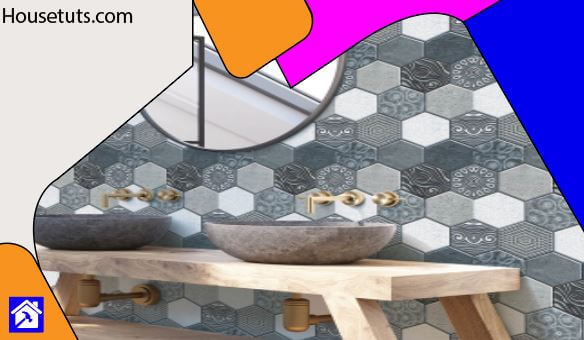
Hexagonal Design
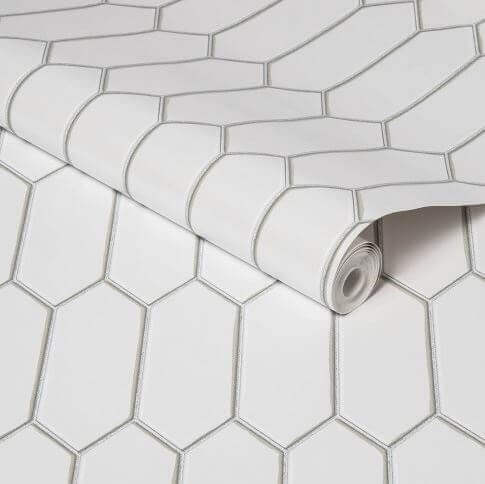
The stylish hexagonal design is also one of the easiest to install. They have a modern metal-style display that looks like brushed aluminum.
This will certainly catch the attention of the industrial-style lovers out there for sure. You can choose from several shades such as gray, brushed metal, and brown.
They will pair quite beautifully with the stainless steel in your kitchen as well as in the laundry room.
Carrara Hexagon Design

This is one of the perfect Peel and Stick Tiles for people who love to do things themselves and are lovers of traditional designs.
You can easily install the Carrara Marble design with less effort on the wall or floor.
The tiles are gorgeous and can be installed as a backsplash for your kitchen, or you can decide to get creative with them. After all, you are at liberty to show your creative side to the people who care to visit your home.
As you can see, there are a lot of styles that one can choose from when it comes to the Peel and Stick tiles.
These are just a few of the endless options you can choose from. Let us move on now.
Tools Needed For Installing Peel And Stick
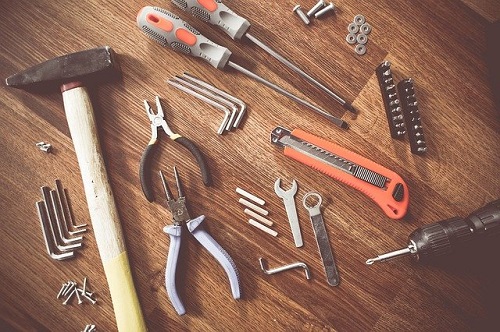
Before installing the Peel and Stick, you need these simple tools below.
- Heavy-duty scissors or shears
- Wet saw
- Ruler or straight edge
- Chalk
- Measuring tape
- String
- Utility knife
- Putty knife
- J-roller
- Tape
- Hairdryer
How To Install Peel And Stick Tile In Bathroom
We will now look at how you can stick the tiles on the walls and floors of your home. Here are the required steps below. Please follow it closely.
- Step 1 – Clean the floor or wall where you intend to install the Peel and Stick tile. Ensure that the place is also dry and that there are no bumps there.
It should be smooth with no blemishes. If you intend to install it on the floor, then make sure to clean and vacuum the floor very well.
There should not be any lingering debris as they may later show through our new tiles. You certainly do not want any of that.
To remove any wax coating, you can use a ¼ mixture of ammonia in a gallon of water. After applying this solution, allow the area to dry for about an hour.
Doing this will help eliminate any moisture there before you get to the next step.
The Peel and Stick tile should never be applied to any surface that has paint, wax, sealant, or varnish on it. The adhesive of the tile will not be able to stick.
- Step 2 – After you are done cleaning the surface, you can now proceed with the pattern of the tile.
You first lay out the tiles on the floor in the design you like and observe them before taking off the protective covering and installing it.
Doing this will help you to see if you want the way you choose or not. If you do not like it, you try out another pattern until you settle on one that you are ok with.
- Step 3 – Now that you have laid out the tiles and seen that you like the pattern, you can start sticking them on the surface wall or the floor. You could start working from the center tile of the room.
That is after you laid the tiles out in your desired pattern on the floor or wall. Take a tile, peel off the protective covering, and then place it carefully on the floor.
- Step 4 – Press down on it firmly. Keep doing this for the rest of the tiles. In case you see that you have made a mistake, you can use a hair dryer to warm the adhesive under the tile and lift it with a putty knife. This tile may not be usable again, so you will have to take another tile.
- Step 5 – Mark the areas you have to cut away with a ruler and then use heavy-duty scissors or shears to cut the tile along the marked line.
Make sure to leave the protective covering on before you begin cutting. You can then take the protective covering off after cutting the tile.
Installing the tile on the wall is not as tricky as you may have been thinking. Position the peel-and-stick tile sheet with the backing still intact on the wall, aligning it with the previously adhered tile underneath.
Get a straight edge and a pencil, and then draw a line along with the place intersecting with the already installed tile.
Now get your heavy-duty scissors again and just cut along the line you drew. After that, remove the defensive back covering and carefully place the tile along the wall.
Make sure that it has lined up with the other tile perfectly.
Ensure all tiles are firmly installed without any air bubbles. You can achieve this by using a baker’s rolling pin or a J-roller tool.
Apply some pressure along the newly installed tiles. Allow the tiles to sit for a few days, allowing the adhesive to thoroughly cure on the walls and floor before cleaning.
Conclusion
So that is how you can use and install the Peel and Stick Tiles in your bathrooms and your homes (stick and peel bathroom tile guide).
As you can see, they are pretty easy to install, and you do not need to get any special tools for the job as this article came with peel and stick tile for bathroom walls guide.
You do not need to call in any professional as well. All you have to do is keep the tiles from extreme heat, and I am sure that is something everyone can manage.
Before designing your bathroom, you might want to check the essential checklist to observe before renovating your bathroom.
We all know that the recent quarantine imposed on several countries across the globe due to the coronavirus pandemic has Read more
The renovation of your bathroom can be quite an exciting task for you. However, before you do anything, you first Read more
Knowing how to install a bathroom sink drain is something that I think everybody in the household should know how Read more
Trying to estimate the exact time it will take to complete your bathroom remodeling can be quite a task that Read more
Worrying that water may squeeze around the edges of the new bathtub you are installing is a common fear, and Read more
You can increase the chance of remodeling your bathroom to look as good as new with these steps, this article Read more

Managing glass shower doors can indeed feel like a persistent challenge, especially when contending with spots and soap scum. Fortunately, Read more